How to Build a Website
A Step-By-Step Guide for Beginners
A marketing page can turn into an online lead generation machine, that’s only if you are doing it correctly. While you certainly can stick to only having marketing pages to attract potential customers, that would also mean you are making sacrifices to content that could be valuable to your business and service.
These might be determining factors for some. People might be attracted to the product/service by looking through the marketing page, but need more information before making any commitments. This is when owning a website alongside marketing pages helps!
(Check out this page to know more about marketing pages.)
There are two main solutions when it comes to building a website—content management system (CMS) or website builders. Each has its own pros and cons, targeting different kinds of users depending on their end goals. People are always tempted to go for the “more popular” options like WordPress (CMS) or Wix (website builder), while I’m certainly not saying that these two platforms are bad, but they might not be for everyone.
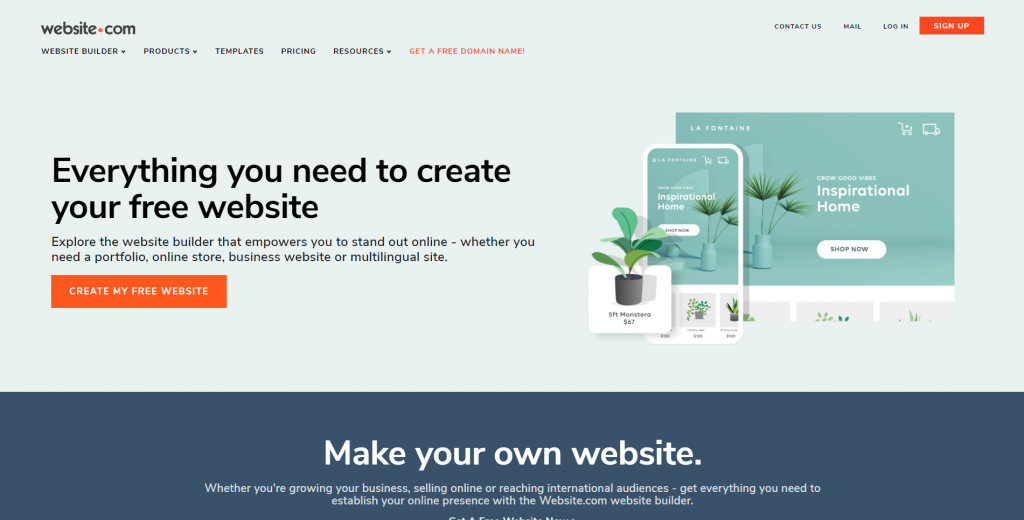
I’ve been switching between different platforms for the past few years, in search of the “right one” that could accommodate my needs, at the same time not too complicated since I don’t have a coding background. If you are a total newbie in this website building world, I am happy to recommend using the website builder platform developed by Website.com.
WHY USING WEBSITE.COM?
-
Easy to use
Like I’ve just said, if you are new to the website building game, Website.com will be a go-to platform. It is an online platform, with no installation of any systems is required when building your website on Website.com—including upload programs like File Transfer Protocol (FTP) for users to upload and publish content online.
-
No manual security updates needed
CMS platforms like Joomla and WordPress are built with open-source scripts, it offers great flexibility for customization via coding and installing a wide variety of extensions. However, unlike website builders, there is no dedicated team of people who will be updating the system on your behalf. Users will need to perform security updates by themselves regularly.
-
FREE plan and upgrade later
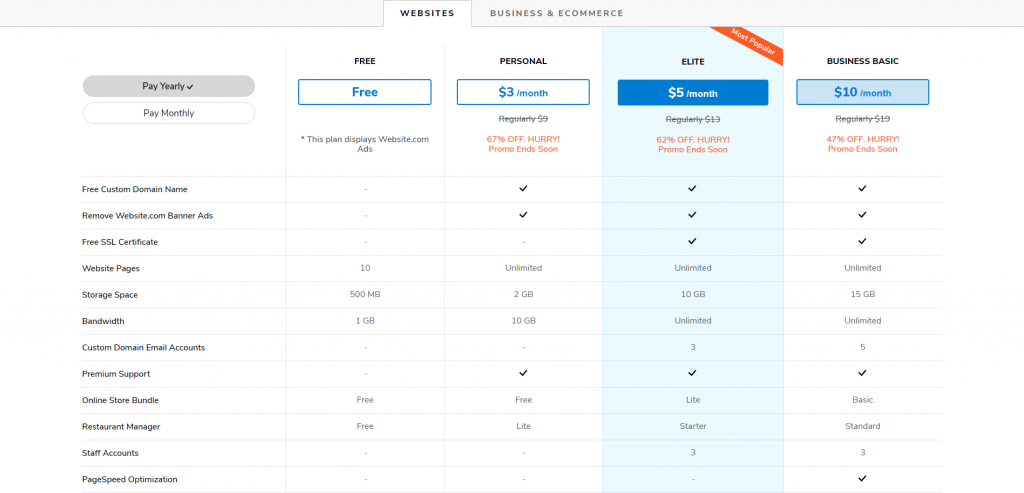
Different platforms offer free plans, but a lot of the time, users can only access limited functions under these plans. Others might offer free plans with full capabilities, but only for a limited time (usually up to 14 days). Website.com’s free plan offers almost all their features (with varied capacity), and users have the option to stick with the free plan or pay to increase the functionality and add even different features to their website as it grows.
CREATE AN ACCOUNT
Register for an account on Website.com.
You can start with their free plan trying out most of their features, and upgrade to paid when you are ready to expand your website.
WHAT ARE CUSTOM DOMAIN NAMES?
Website.com’s paid plans come with a free custom domain name. A domain name is essential to your website. It is your online name, representing who you are and what you do.
Here’s how people or businesses create their domain name
- Business sites – CompanyName
- Personal sites – FirstNameLastName, NameProfession, NameHobby
Tips for creating a domain name
-
Stick with .com and other traditional domain extensions
An increasing number of websites are using newer domain extensions like .co, .ai, .app, .io, but these are usually applicable only if your products/services are in a specific niche industry. Generally, if possible, I would strongly suggest using traditional domain extensions such as .com, .net, and .org. These are the most domain extensions, and people generally view these as credible and professional. Plus people are more likely to type out these domain extensions, particularly with .com.
Another category: country-specific extensions (country code top-level domain, ccTLD). These are domain extensions such as .us, .co.uk, .ca, applicable to small local businesses, or if you have a targeted geographical customer group. Some locations would have specific registration requirements. For instance, if you are registering for .us ccTLD, you would either need to be a U.S. citizen, resident, organization, or a foreign entity with a U.S. presence.
-
Make sure the domain name is short
The longer a domain name is, the higher chance your visitors will get your website URL incorrect. Try to keep it short and simple, ideally three to four terms as Google suggests.
-
Keep it simple and easy to spell
Other than keeping it short and memorable, be sure your domain is easy to spell and pronounce too. Try to avoid repeatedly using the same character, people could potentially misspell it. And if you need to slowly spell out your potential domain name so others could mark it down, this is a pretty good indication to think of another domain name.
CHOOSE A WEBSITE TEMPLATE
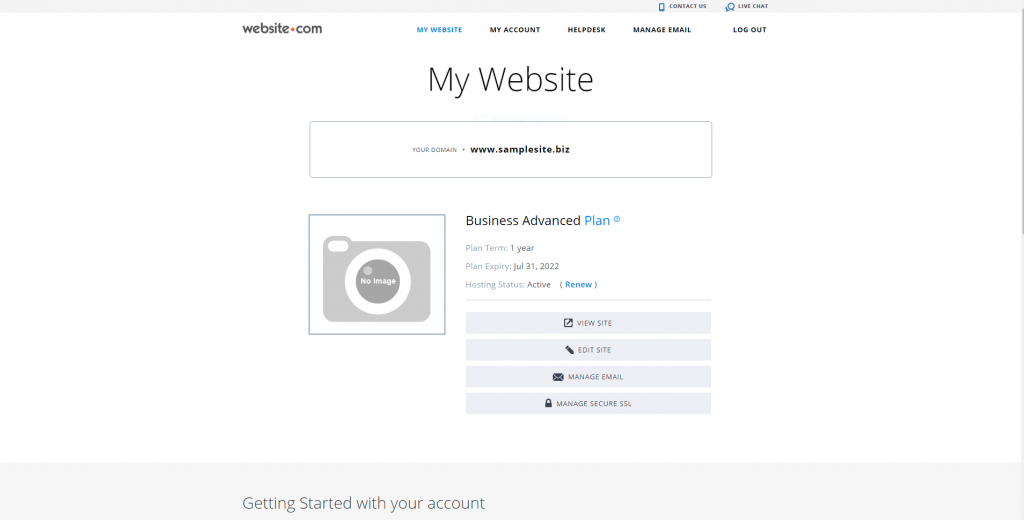
After logging in, click Edit Site and start building your website.
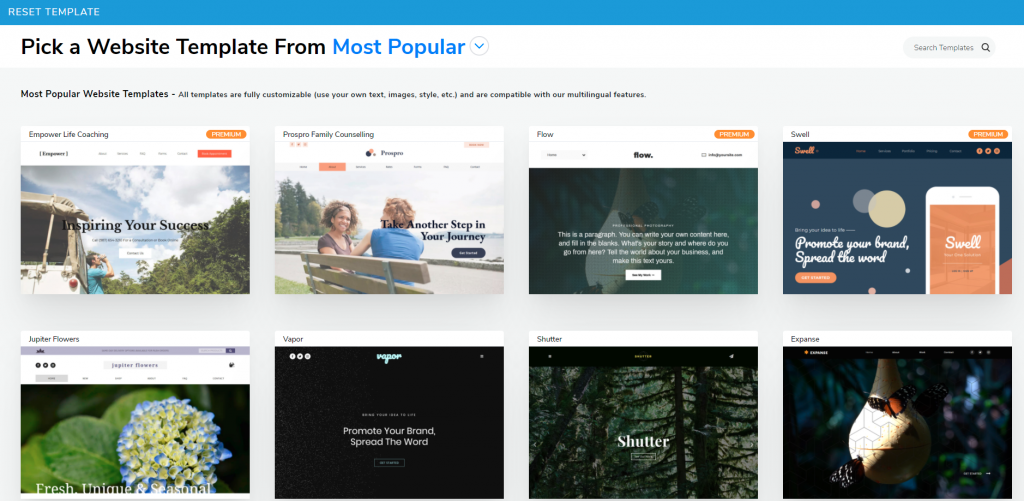
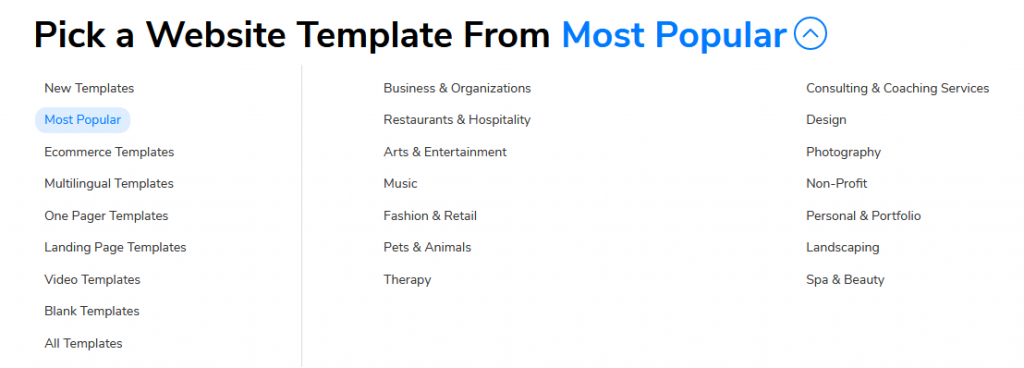
The system will bring you to the Website Template page. There are over 500 designs, all specifically crafted to fit different needs. Whether you are building an online portfolio, restaurant website, marketing page, legal consultation website, or for event registration online, you would be able to find one to start on with.
To view the website template category list, Click Most Popular, and a drop-down menu will appear.
Some people might want to build the website from scratch. While you can certainly do so, I would generally suggest doing this only if you have a clear idea of what you want and how to get there. Otherwise, you might want to use and customize the templates instead.
After choosing a template, you can go on and replace the text and images to further customize your website. Every element included in the templates is placeholders to show users the overall design of the web page.
One-Pager or Multi-page
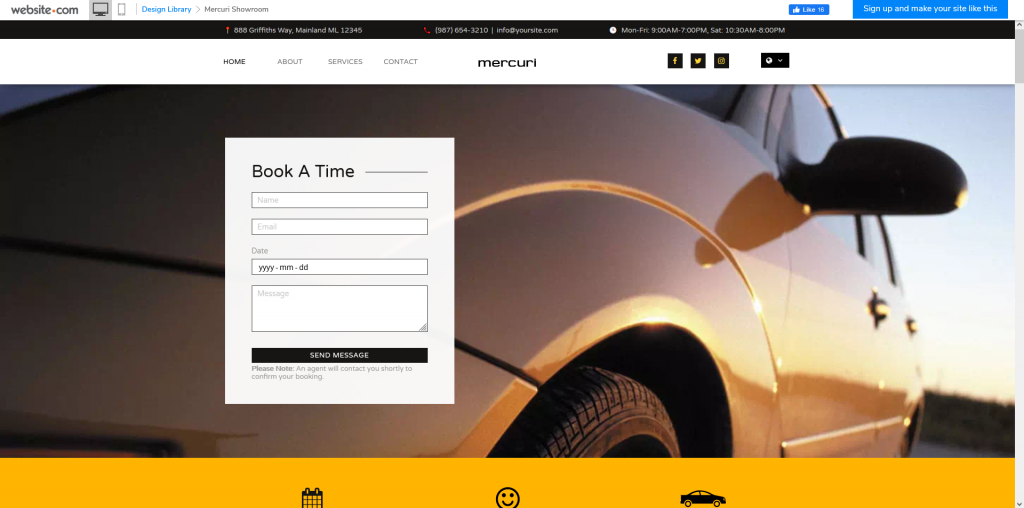
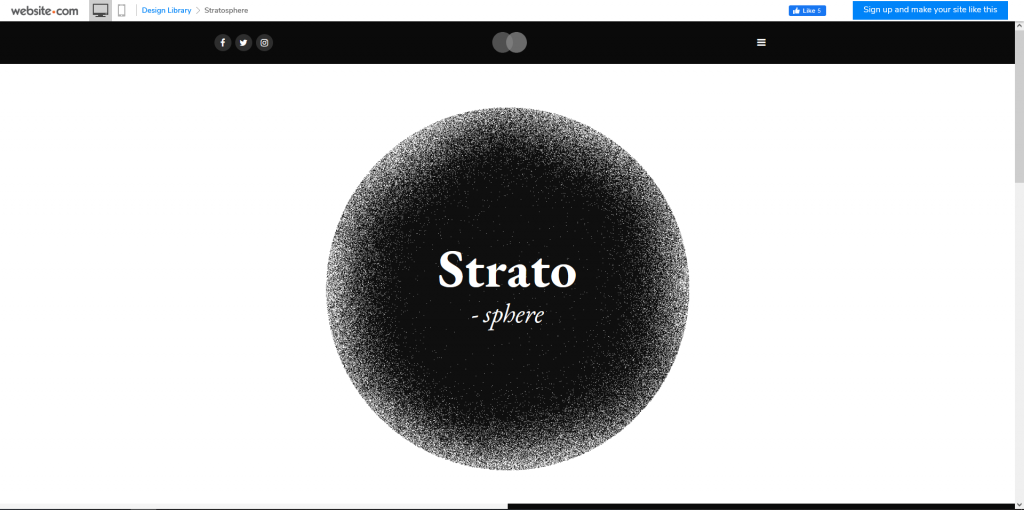
It is also important to consider how you would want to structure your website, this would affect your selection of templates. Are you aiming for an all-in-one one-pager website (where you have all contents on a singular web page), or a website with multiple pages (visitors have to navigate through different pages for the content)?
One-pager example: Mercuri Showroom
Multi-page example: Stratosphere
Once you’ve decided on a template, click Select and start being your website using the Website Builder.
ADD WEBSITE CONTENT
It is always recommended to get your content on your website before customizing it. You won’t be able to visualize your website if it is empty.
For starters, these are the 3 must-have elements:
-
Homepage
This is most likely the first page your visitors will see, this is their first impression of your website. The general rule of thumb, they should soon have an idea of who you are and what you do the moment they see your homepage.
-
About Me
This is where you can introduce yourself, establish your credibility, and start establishing your connection with your visitors.
-
Contact Me
Whether you are aiming to expand your network, promote your business, or just sharing your hobbies and interests with others, creating a website helps you to connect with people with ease. A website without a “contact me” page is near to useless. Just imagine how you can persuade people to trust you (or your service) if you don’t let them get in touch with you. Or even simply believe that you are an “actual existing human being” providing legit business?
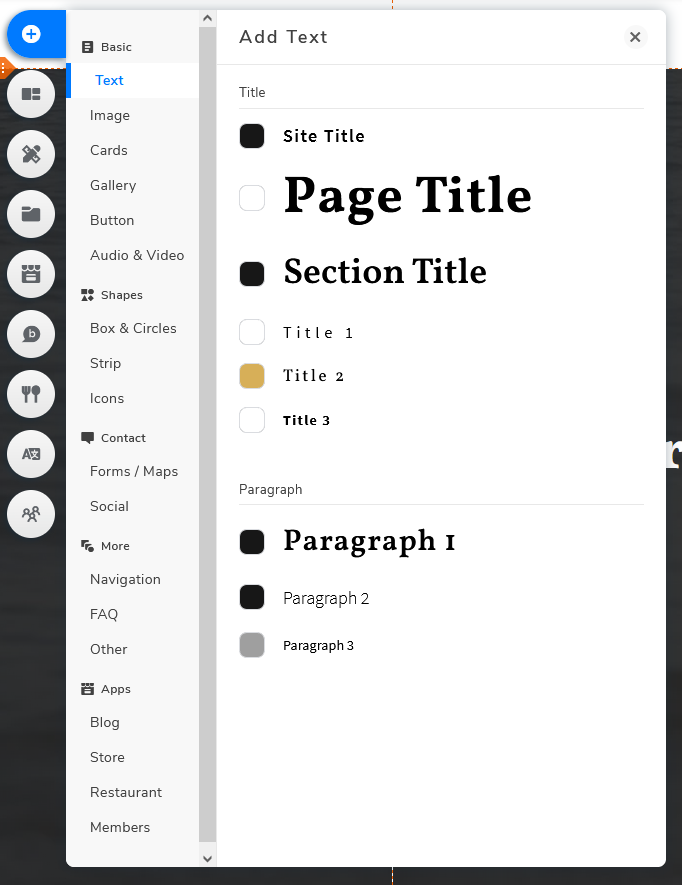
Add Text
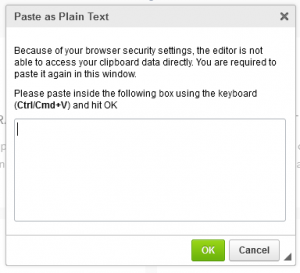
You can type directly in the website builder to add text. Or alternatively, type somewhere else, copy and paste it into your website builder. While in most cases a simple copy & paste should work, there are occasions where you might also be copying the embedded formatting from the original file, which is totally different from what you have set in your website builder. In order to keep the consistent designs, right-click your mouse and select Paste as Plain Text.
Add Multimedia Elements
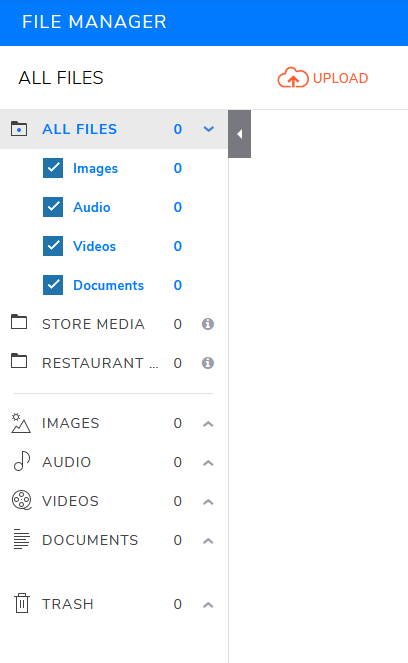
Select Add Elements to add Image or Audio & Video to the page via the File Manager. This is where you can edit the multimedia elements. Depending on your enrolled plan, there will be a storage limit associated with it. If you are hitting the maximum storage capacity, the simplest way is to upgrade your plan to expand it.
Add Elements & Cards
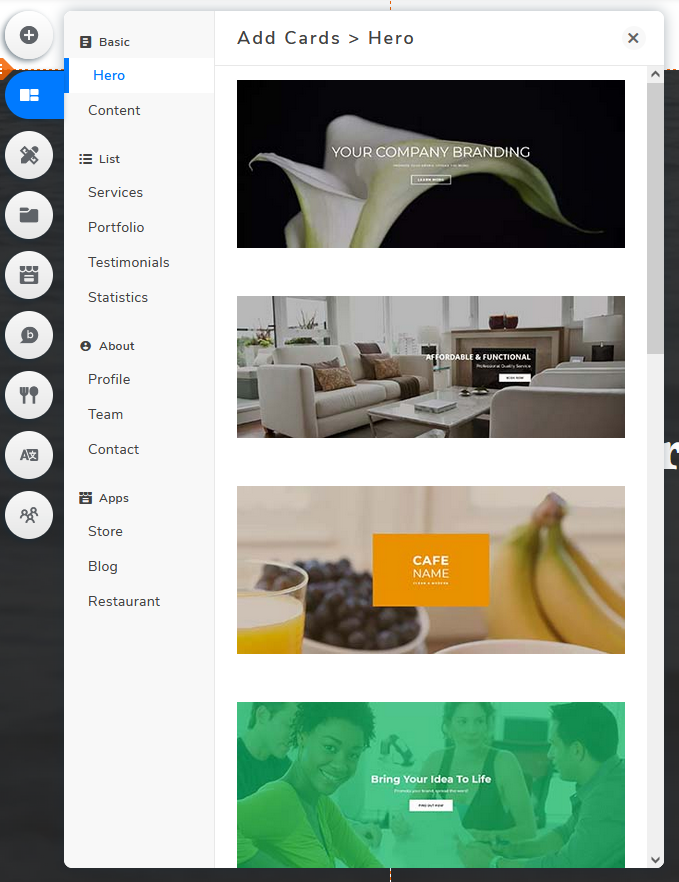
To add additional content to your website, click Add Elements or Add Cards.
Add Elements
Add Cards
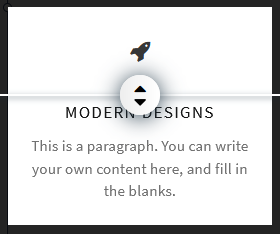
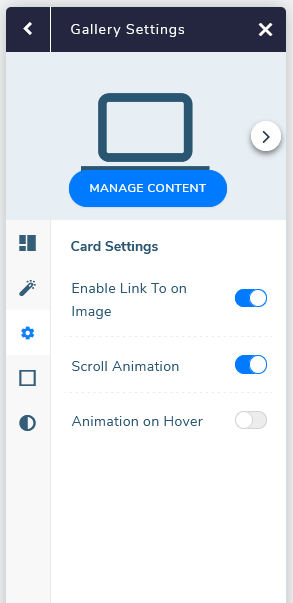
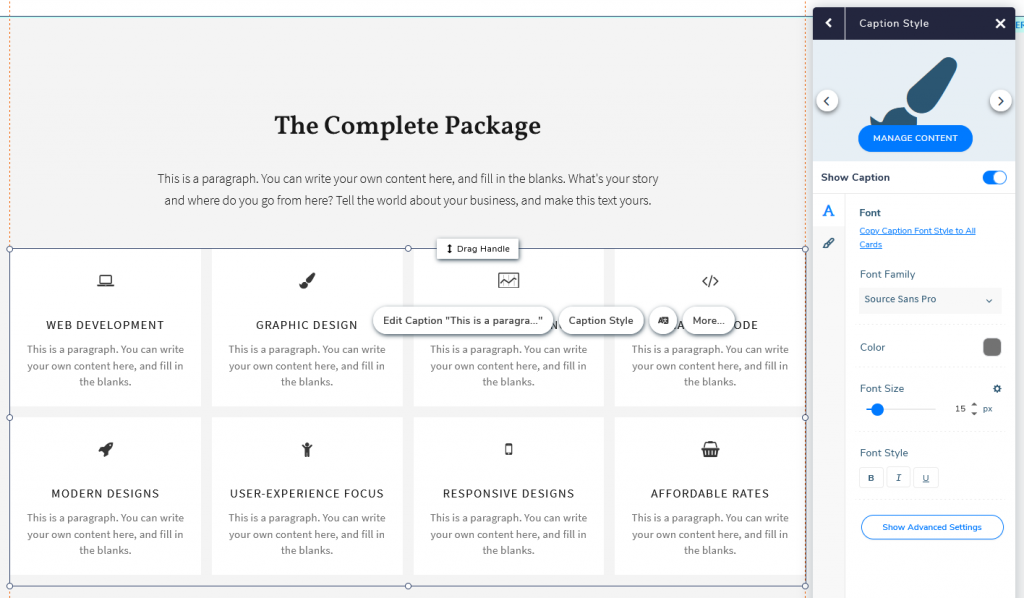
Both cards and elements are essentially “contents”, but cards are built with advanced functionality, such as animation and proportion adjustment.
Add Proportions
Animations
Tip: If you wish to apply any changes across all elements within the same card all at once, select Copy Font/Image/Icon Style to All Cards to apply the same changes in one go.
ORGANIZE YOUR WEBSITE
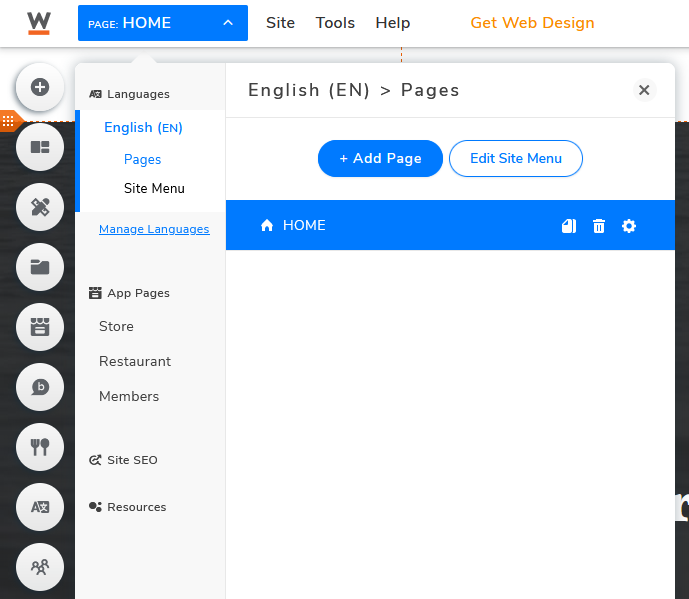
One-Pager Website
This is simply the type of website where your visitors will be navigating between different sections without jumping back and forth between pages.
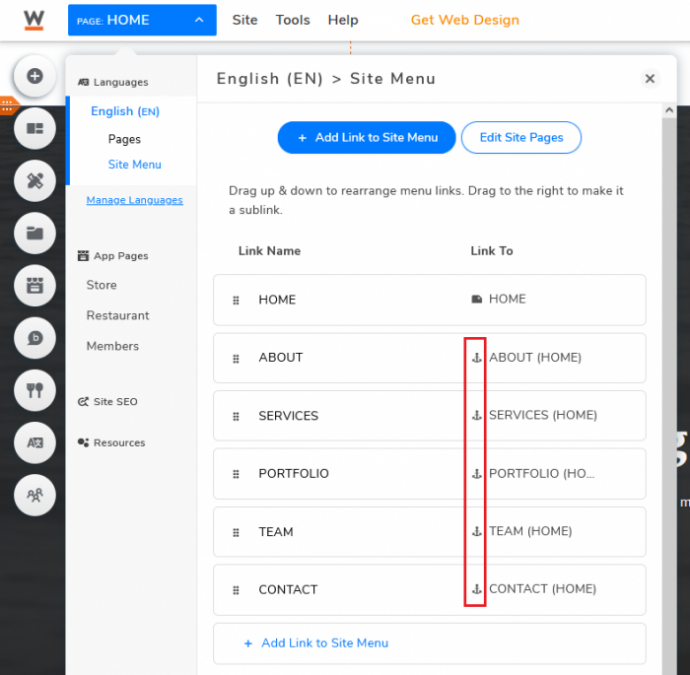
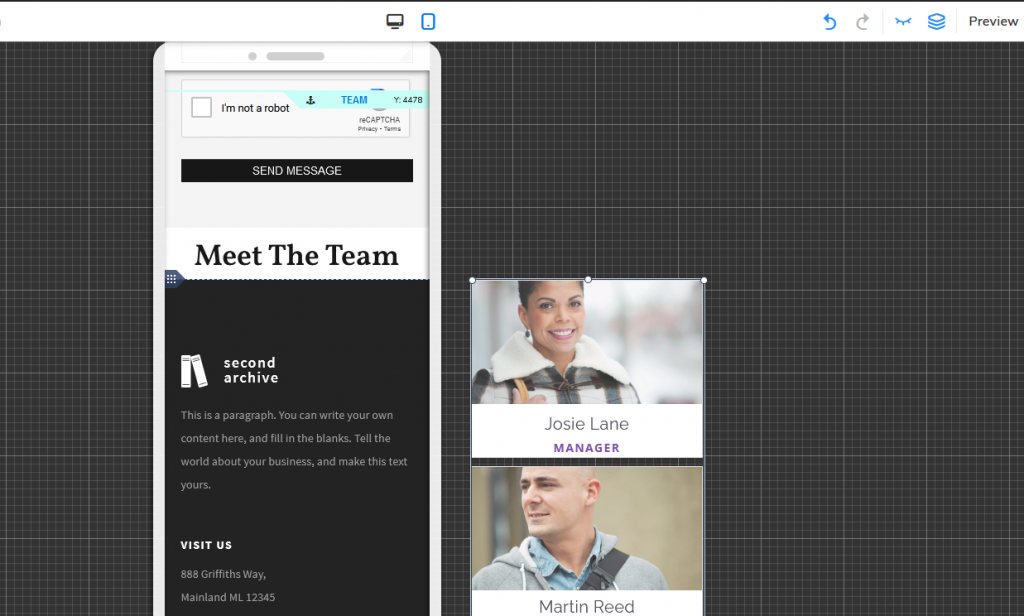
You will need to set up anchor links for better navigation via the website menu. I will be adding a “Meet The Team” section as a demonstration to walk you through the process of setting up anchor links.
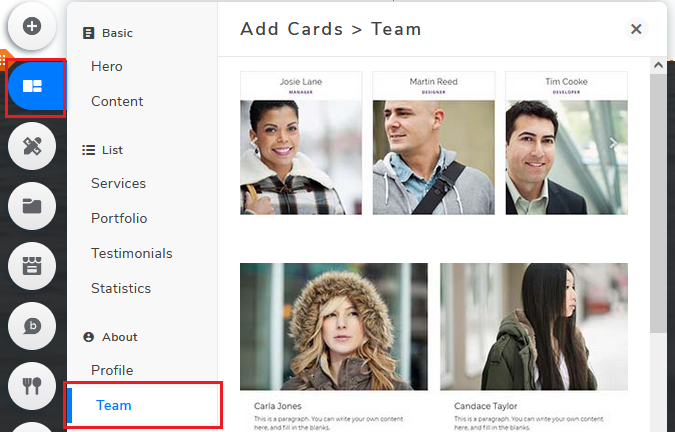
Add Cards > Team
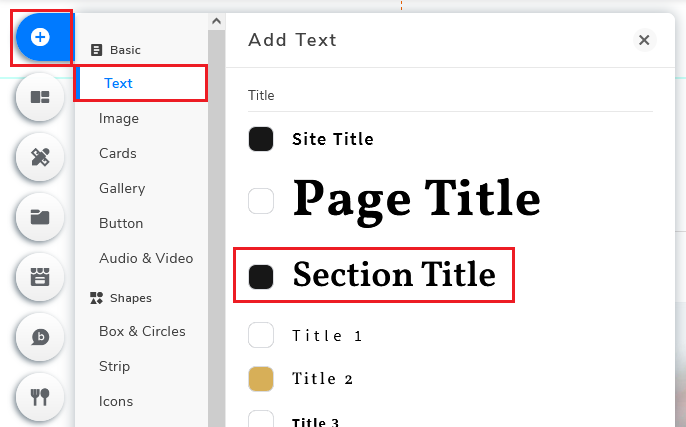
Add Elements > Add Text
Title > Section Title > “Meet The Team”
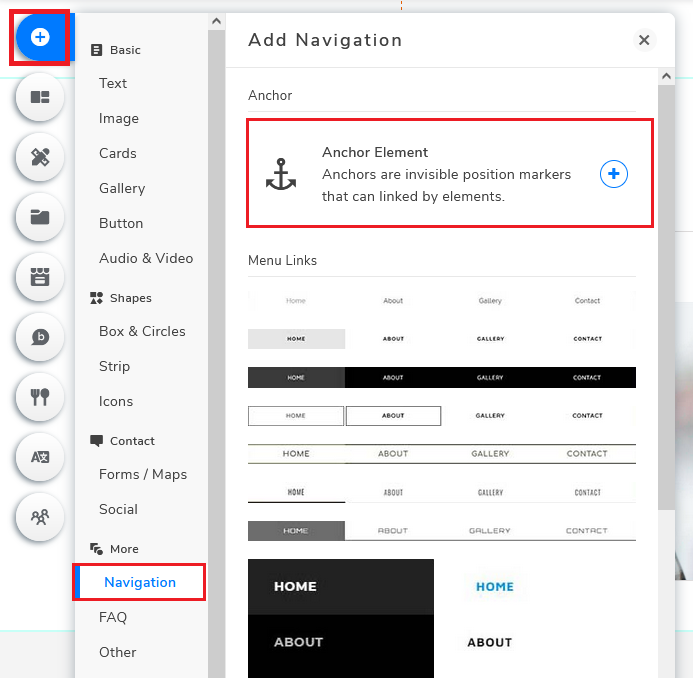
Go back to Add Elements, this time click Navigation then Anchor Element.
Add Elements > Navigation > Anchor Element
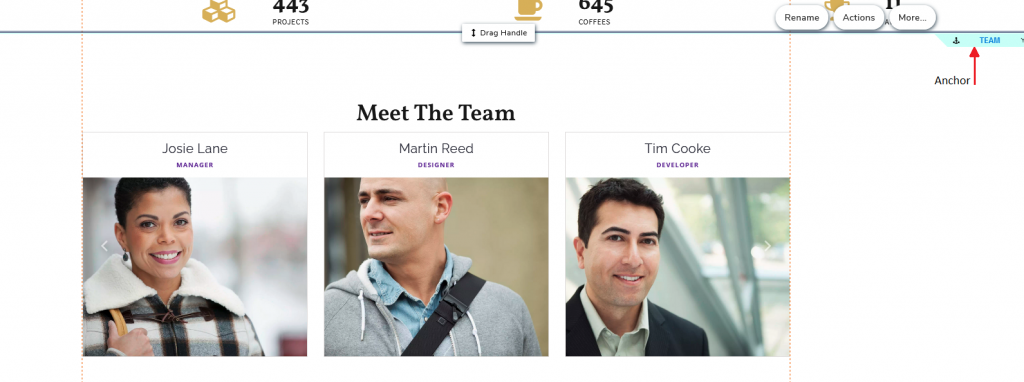
Drag the anchor element (horizontal line) to “Meet The Team” > Rename “TEAM”
This is where your visitors will navigate after clicking the menu (source anchor).
Next, you will need to create a link in the menu bar to link it with the anchor element.
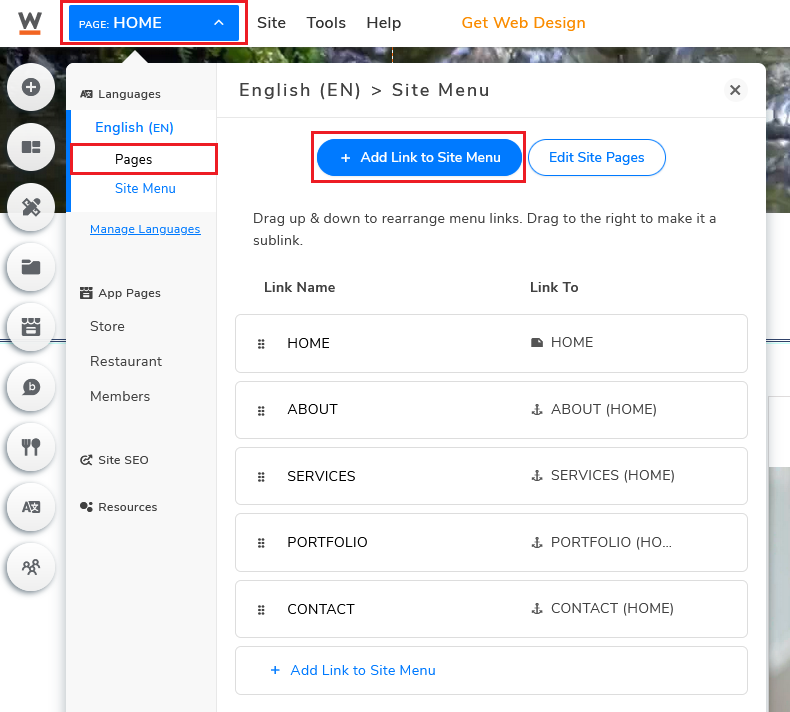
Click on the blue Page button and select Add Link to Site Menu under Site Menu.
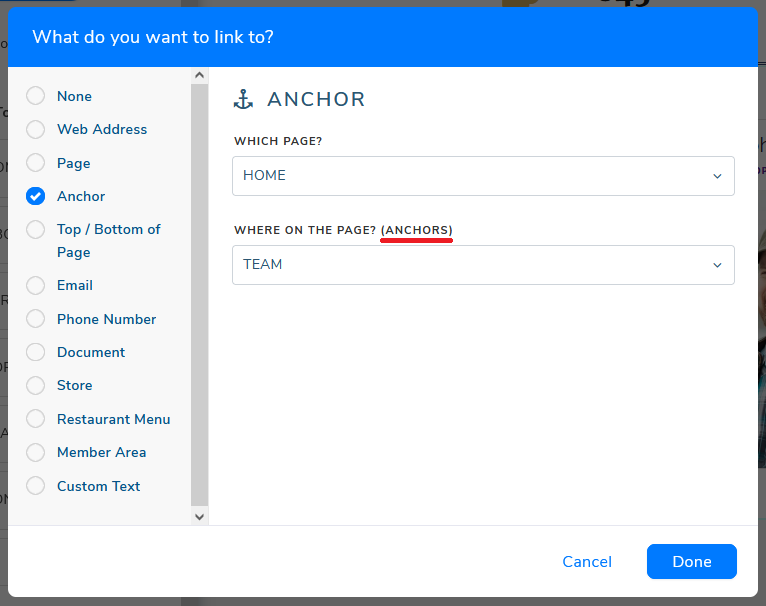
Lastly, select Anchor to create an anchor link.
Choose the page (for this example: homepage) and the anchor element (“ANCHORS”) that the specific anchor link will be linking to.
Multi-page Website
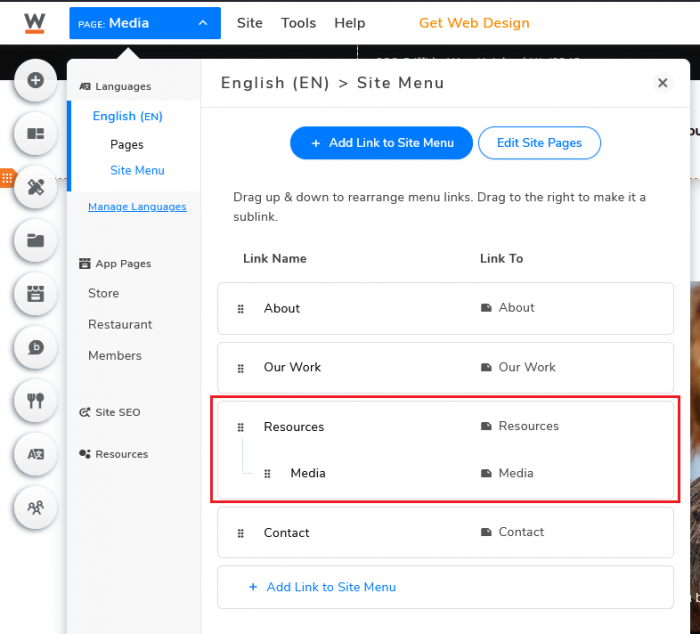
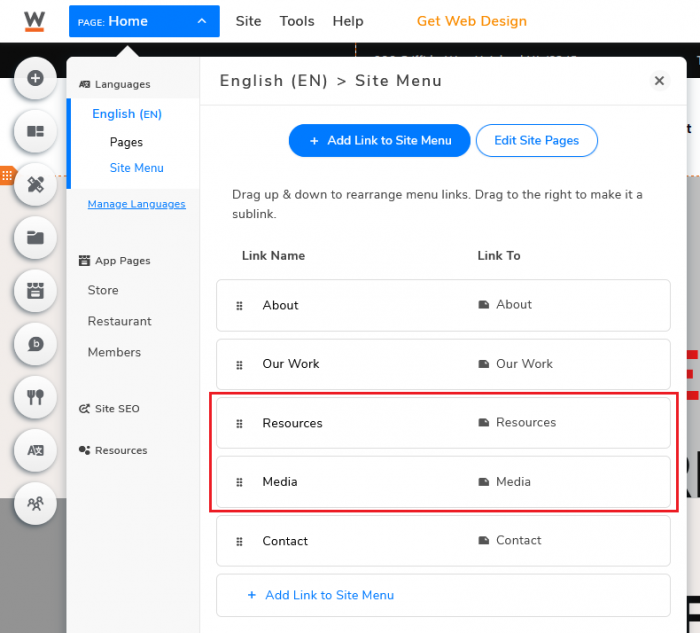
Contents on multi-page websites are typically distributed to different pages and sub-pages.
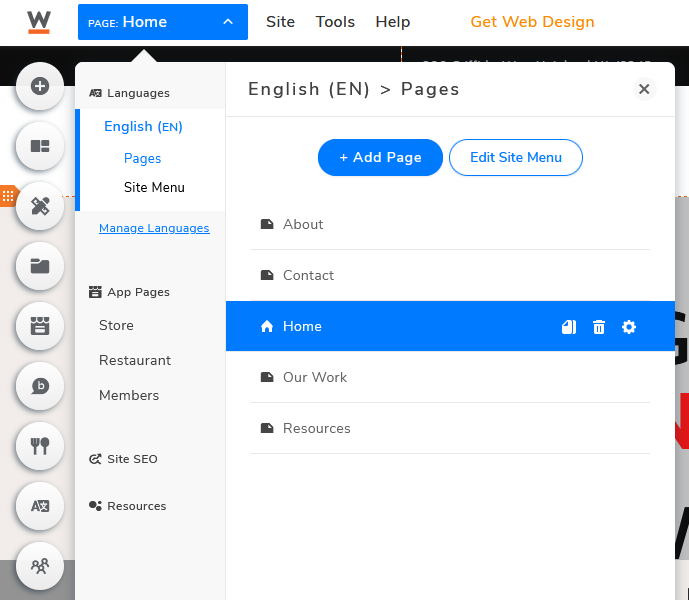
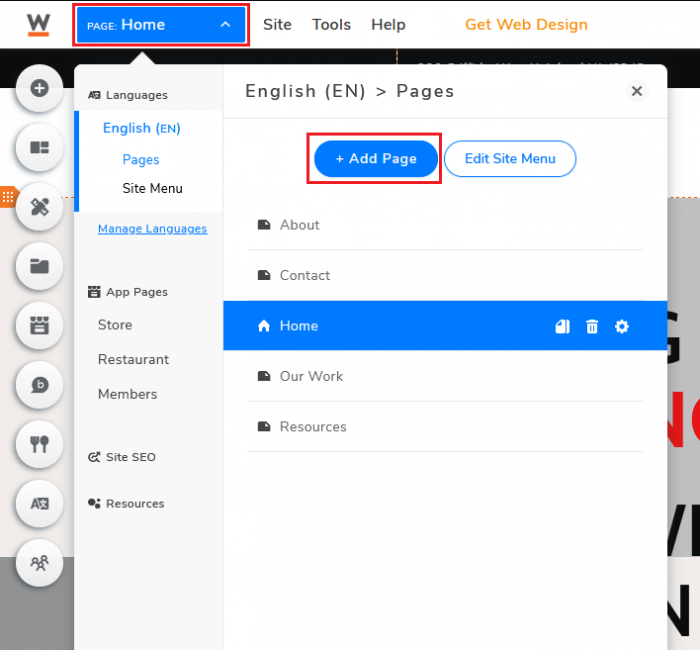
You will see multiple rows listed under the Pages section, as compared to just one single row if using one-pager templates.
Multi-page template
(Multi-Page) Links – Pages
Select Add Page to create a new page
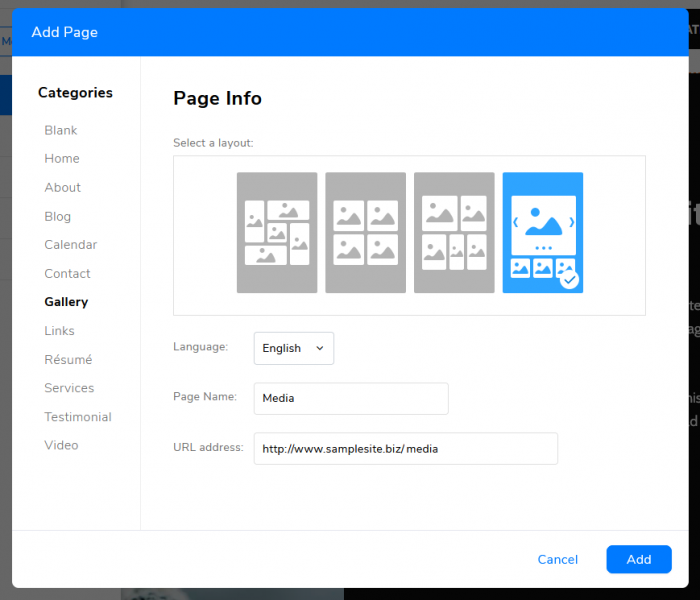
Like mentioned earlier, you can definitely create a web page from scratch by selecting the Blank page option, and input cards and elements one by one. This is best for people who have some sort of experience in website building.
Alternatively, you can use one of the customizable layout templates. Once you’ve found one that’s got everything you need, click Add and the system will generate the web page for you.
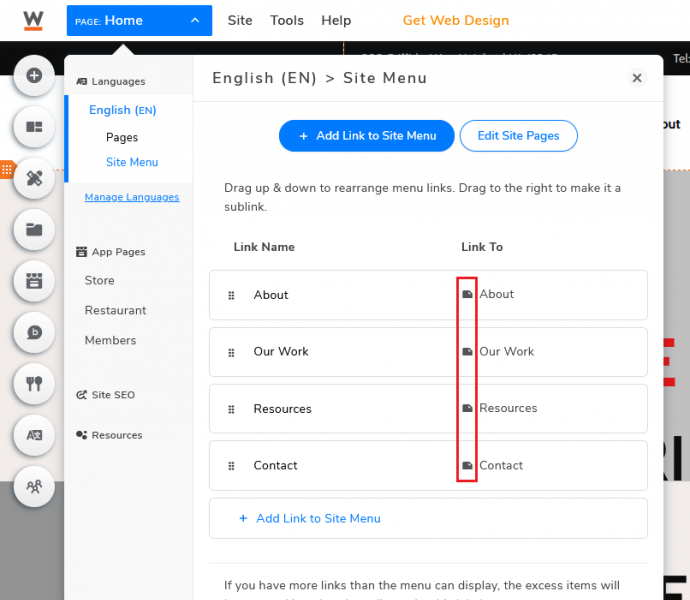
Menu Bar (sub-page)
Menu Bar (separate page)
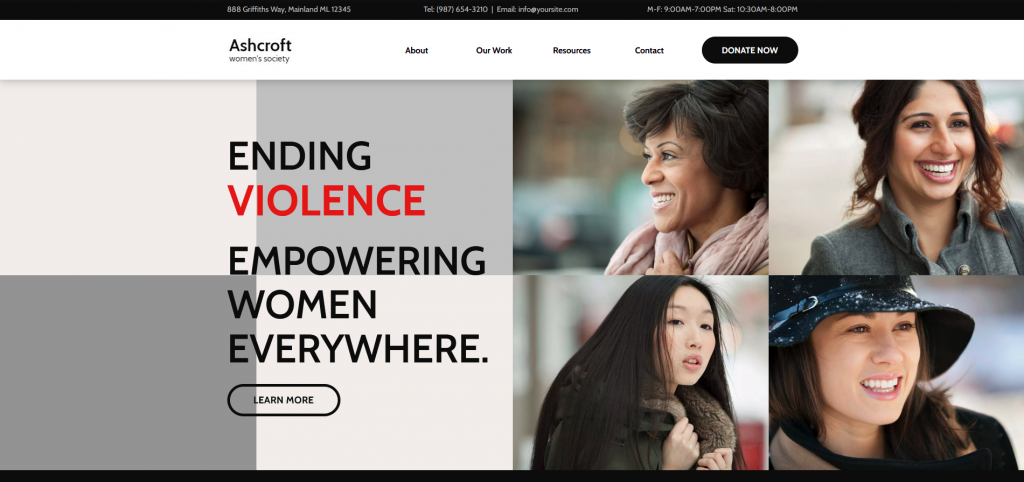
Multi-page template example: Ashcroft Women’s Society
OPTIMIZE YOUR WEBSITE FOR MOBILE DEVICES
With nearly half of the world’s total population owning smartphones—a rough 3.8 billion people, smartphone users are now generating over 70% of worldwide website traffic. Having a website optimized for mobile screen sizes is no longer a nice-to-have option. It is now a necessity.
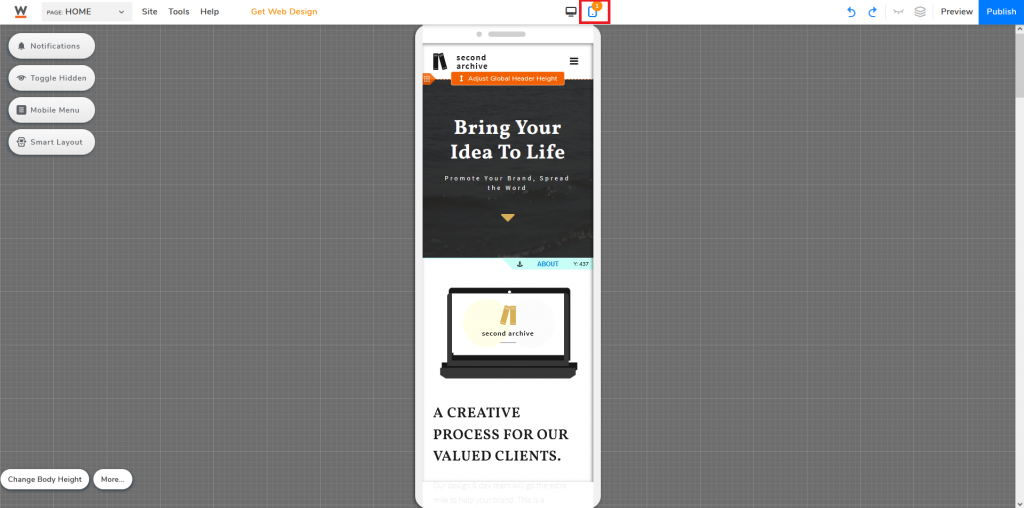
To activate the mobile editor, find the Mobile button at the top of the builder.
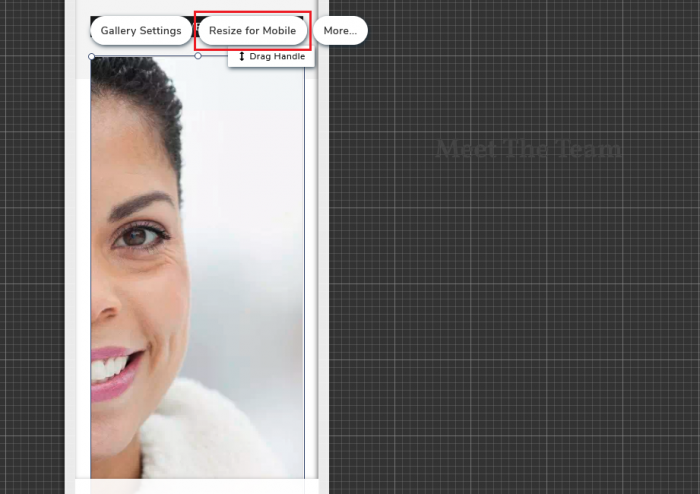
After activating it, the system will start readjusting and reorganizing all the content for mobile. It won’t be perfect though, some of your content could potentially be out of frame or not compatible with mobile screens (like element sizes are too big). To resolve these issues, click on the specific element and select Resize for Mobile.
Another option is to activate Smart Layout which is essentially doing the same thing. Though you might still need to fine-tune elements one by one, it’s still better than doing it all by yourself!
You can also hide certain elements by dragging them out of the frame. Alternatively, click on the element and select Hide From Mobile. This function is only available on Mobile.
ONE LAST STEP, PUBLISH YOUR WEBSITE!
It’s always a good habit to do some final checks before publishing your website. Go back and forth between the website builder and mobile builder interfaces, and make sure everything is nicely placed and in the right size. If everything is good to go, click Publish.
Congrats, your website is now live!
Website building used to be a very difficult and technical task, let alone trying to craft a nicely designed one. But thanks to all the available tools and specialists, it is no longer a mission impossible for an average person to create their own website.
Now that you have published your website, it is now time to create content, enrich it, and make it visible to others!

